Skip to content
Home
Text Stories
Story Chronology
Story List
Story Map
Extras
AI
Captions
Kinky Kaitlyn Texts
Little Kinky Books
Short Stories
Snaps
Models
News
FAQ
Disclaimers
All-access Zone
Reddit
SubscribeStar
UniFans
Throne Wishlist
Search
Search
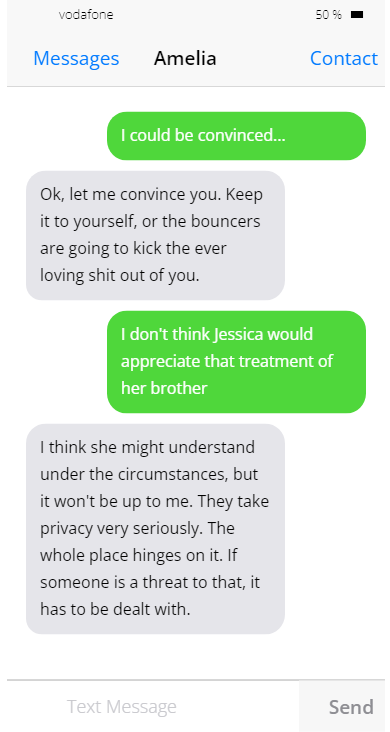
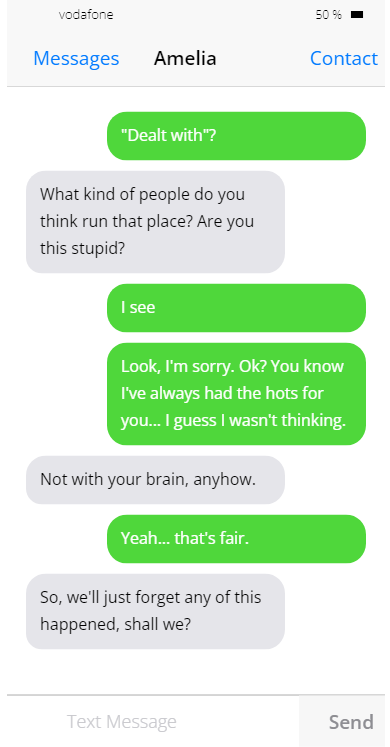
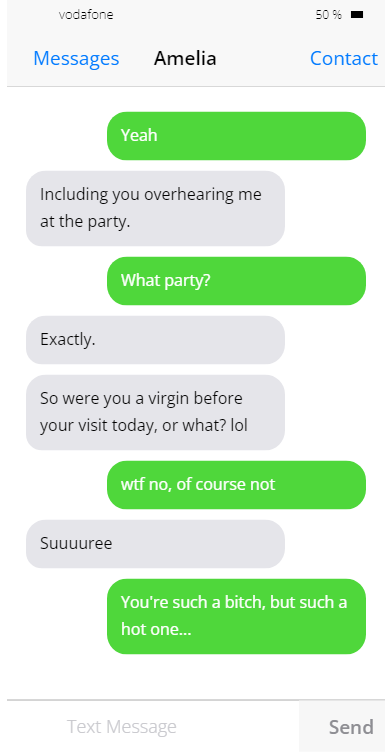
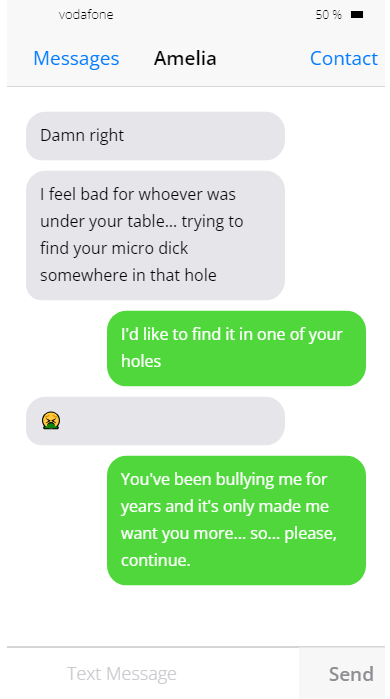
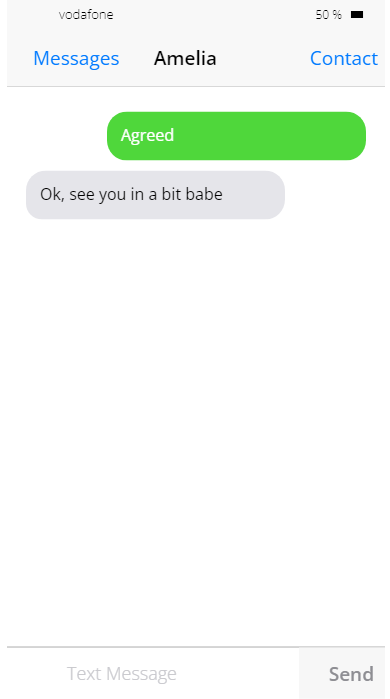
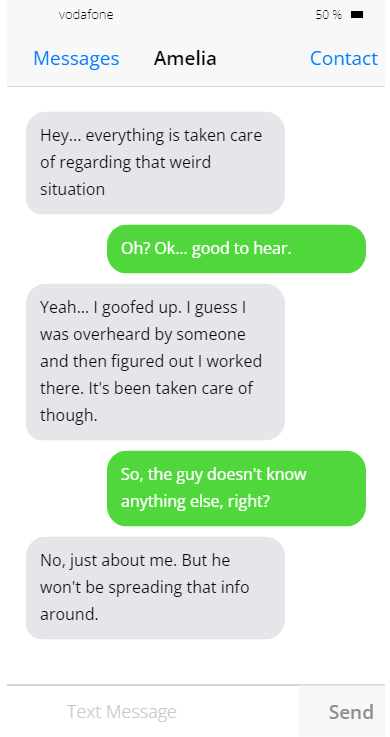
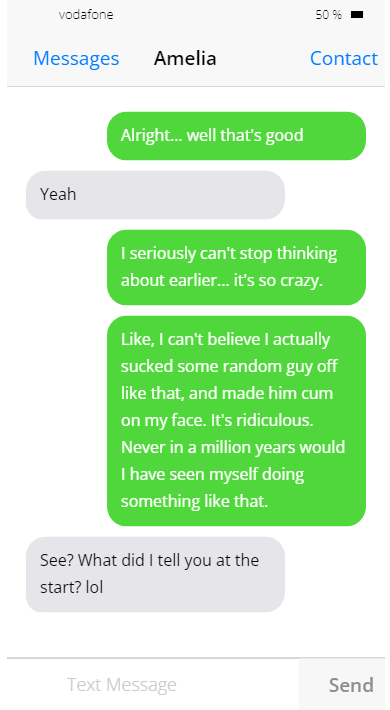
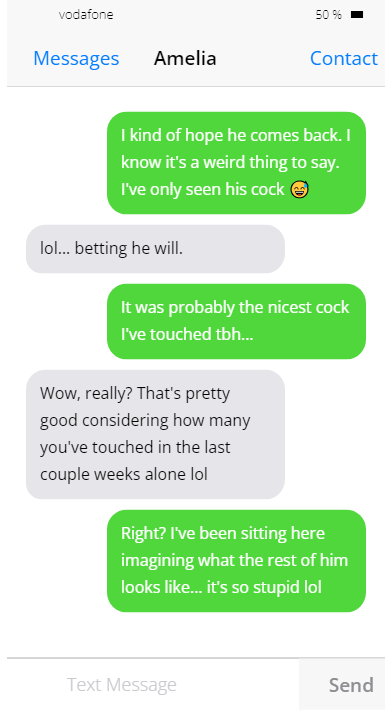
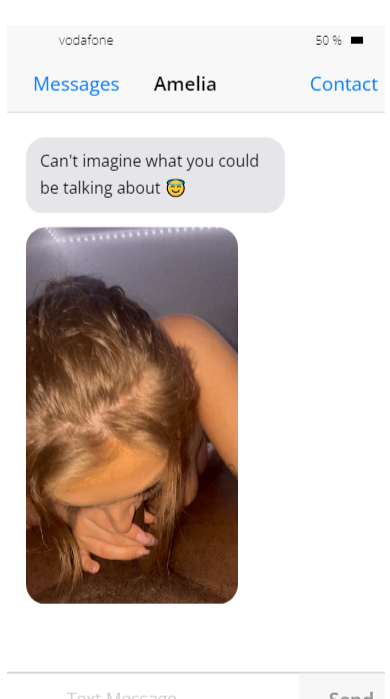
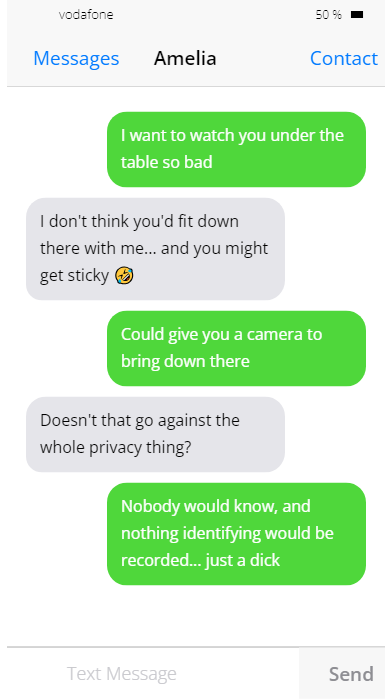
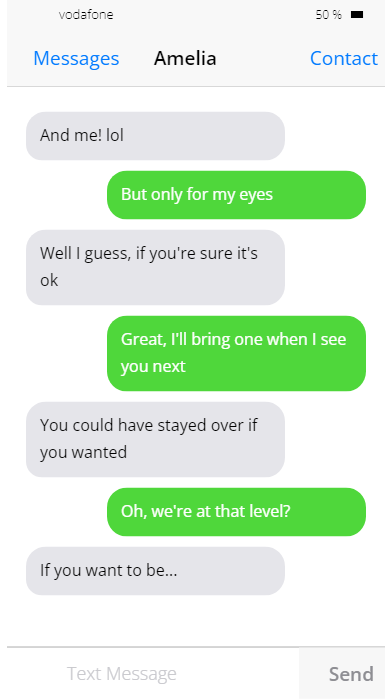
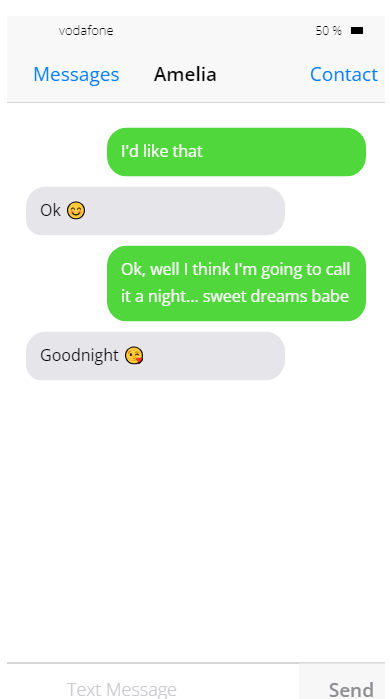
Beneath the Milking Table: Part 3
Categories:
Uncategorised
23 August 2024
Related Article
28 May 2026
Are You Ready?
17 February 2026
How am I looking?
11 March 2024
Fallyn’s Secret Gift
Popular Now
Cumming of Age
8 June 2026
Are You Ready?
28 May 2026
Hotwife Cum Queen
26 May 2026
From Archive
June 2026
May 2026
April 2026
March 2026
February 2026
January 2026
December 2025
November 2025
October 2025
September 2025
August 2025
July 2025
June 2025
May 2025
April 2025
March 2025
February 2025
January 2025
December 2024
November 2024
October 2024
September 2024
August 2024
July 2024
June 2024
May 2024
April 2024
March 2024
February 2024
January 2024
December 2023
November 2023
October 2023
September 2023
August 2023
July 2023
June 2023
May 2023
April 2023
Categories
A Blissful Reunion
A Compassionate Cheat
A Cousin's Betrayal
A Nice Young Man
ageplay
AI
Amy's Hotwife Bachelorette
Amy's Hotwife Getaway
Announcements
Babysitter
Babysitter Seductress
Beneath the Milking Table
Best Friend's Stepmom
Best Man
Bestie
Big Titty Goth Mommy
Bully
Burgled
Caption
Cheat
Cleaning Up and Getting Dirty
CNC
Comic
Condo Cuck
Cuck
Daddies Club
Daddy's Girls
DDLG
Divorce Double Trouble
Doctor's Orders
Domination
Domination Double Trouble
Drafts
dubcon
Ex
F/F
F/F/F/M
F/F/M
F/F/M/M
F/M
F/M/M
F/M/M/M
F/M/M/M/M
F/M/M/M/M/M/M
F/T
Fallyn's Little Secret
Fallyn's Secret Gift
Family
Fostering Fun
Freeuse
Friends with Benefits
From Fawn to Vixen
Good Girl
Grade A Student
Grounded
Grounded 2
Grounded 3
Helping Alice
Hitchhiker Hunt
Homewrecker
Hot Past
Hothusband
Hotwife
Hotwife Alexa's New Neighbors
Hotwife Alexa's Work Party
Hotwife Amy's Ex
Hotwife Cum Queen
Hybrid Story
Hypno Sis
Hypnosis
Hypnosis/Timestop
Jenny
Jenny's Journal
Journal Story
Kaitlyn's Story
Kissing Cousins
legooch
Lexi's Adventures
Lexi's Dark Corner
M/M
Maddie at Home
Maddie at School
Maddie at Work
Maddie's Adventures
Maid
Maid of Honor
Make Me Bad
MILF
Mommy & Mira
More than a Babysitter
No Place Like Home
noncon
Not Only Fans
Old Story
Only for the Money
Open Relationship
Other Duties as Assigned
Paying the Babysitter
Paying the Rent
Pegging
Penny Pegs It
Personal insights and stories
Pet Play
Polls
Puppy Girl
Roommate with Benefits
Rough
She Had Me Pegged
She's a Rescue
Short Story
Sissy
Sister Swap
Slut
Snaps
Sweet Little Sister
Teacher/Student
Teaching Stepsis
Text Stories
The Hesitant Hotwife
The Hesitant Hotwife Returns
The Hesitant Stag
The Hesitant Stag 2
Training the Boss's Daughter
Truth or Dare
u/0nthebeach12
u/18bootycutie18
u/alexxa_fire
u/anonpeepe
u/ariaafterdark
u/asya_little
u/AuspiciousKiwi
u/AvaMoon042
u/BabyMooshii
u/BbyMooshii
u/Beckyzworld
u/bellapuffs
u/Beneficial_Ant8288
u/britney_girl2368
u/Bunnygirlbrynne
u/Bustyhousewifey
u/Bustyrixia
u/callmesloo_
u/ceecee99x
u/CuddlesandCreampies
u/cutecheeks69x
u/CuteXChibi
u/cyb3r-lilith
u/daddysbadkitty666
u/duckpicspls
u/dustyseemenow
u/emily_glass909
u/eveduatson
u/evekozi
u/FullyAquadic
u/Funcouple_222
u/Gamingbunny_
u/Genataliaxxx
u/gingrnspyce
u/Glum_Temporary3696
u/Gracie_Greyy
u/hbananapie
u/huge_leo
u/iggytheprincess
u/impossiblepig666
u/iNeedMyEgoBoosted
u/iNeedMyEgoBooster
u/jessnjamez
u/Julianathecolumbiana
u/juliejessOF
u/Karisss666
u/katarina_cox
u/kaynatrix
u/Kenzie_mae111
u/Kimber-lina
u/Kylieisland
u/lailadelstar
u/larameans
u/Lebannen_n
u/li5tkid
u/lise_peach
u/Lonelystoner2000
u/Lord_of_the_phil
u/loveletterssss
u/LovingEli1
u/lvekayswrld
u/marianaft
u/mayakayagaia
u/medicatedart
u/mov123
u/NastyBabyGirl77
u/naughty_nicholes_OF
u/NeedySuburb
u/New_Perceptions8935
u/Neyrodesun
u/NiaszMartin
u/NinimUwU
u/NWQueen88
u/nymphetts
u/OkCourse4569
u/Panderdab
u/peachyy_____
u/Petitencurvy112
u/PetitePoster18
u/prettybbyxxo
u/Professional_Duty_2
u/PupFiggy
u/Purplekills
u/Purplekills3x
u/randapanda423
u/RayeRoze
u/Risky__Frisky
u/RockMyWorldDaddy
u/Ruby21x
u/samsvaredu
u/schleeey
u/secretsofapplepie
u/SemenovaElena
u/Seroquelboogers
u/shortandfeistyy
u/sillysquere
u/slimmaddiepattiexo
u/snakylola
u/sparklektty
u/SweetV4mpire
u/sylvieRays
u/Temmikyu
u/thebeck51488
u/thestellaray_
u/thoughTsk
u/ThrowawayfunDFW
u/toasty_cakez
u/torontoblondie6
u/Toxinate0290
u/Upbeat-Affect-8209
u/ursecretgf
u/usvameri
u/uwuninu
u/Xchloebrynne
u/xx-mandapanda-xx
u/ZaraCrazyxo
u/zenlux_
u/Zllimpat
Uncategorised
Uncle
Velvet Doll
Voyeur
Watch Your Step
Work
Yes Daddy